In brief: The Profiles CCT plugin will be completely removed from UBC CMS on December 2 2022. If you use this plugin on your site, you will be affected. We outline why and what you can do about it below.
One of the more popular plugins in use on UBC CMS is the Profiles Custom Content Type (CCT) plugin. This is partly because, for a while, it was activated on all new sites that were created.
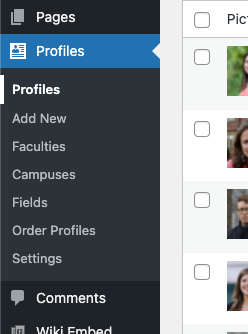
If you’re unfamiliar, Profiles CCT allows UBC CMS website owners to create individual profiles for people within their faculty, unit, or department and then list those people on the public-facing side of CMS websites. The plugin was developed more than 10 years ago as a collaboration between (what is now known as) CTLT, Arts ISIT, and other members of the UBC CMS community.
Rationale
In mid-2019 we took the decision to remove Profiles CCT from the list of plugins available for administrators to enable on their sites. This was due to a required PHP language upgrade (from PHP 5.3 to PHP 7+) which caused hundreds of warnings and errors in the plugin, completely broke some lesser-used functionality, caused confusion with users around taxonomies changes in WordPress core itself, and generated a substantial support load for our team. The Profiles CCT plugin provides ways for website owners to create completely bespoke taxonomies, terms, custom fields, and a multitude of other ways in which it can be customized. Whilst undoubtably potentially useful to website owners, this has meant that it has become next-to impossible to maintain and support.
In late 2022 there is another required PHP language upgrade. This upgrade, one very much beneficial to the language and its users, will be substantially more challenging than the update to PHP 7 several years ago. And with it, unfortunately, comes the end of the Profiles CCT plugin. Once we upgrade to PHP 8+, we will force deactivate the Profiles CCT plugin on all sites on CMS. If we don’t do this, your entire website will be unavailable after the upgrade; not just the profiles pages, and even if you don’t use any profiles functionality.
If you choose to take no action, then on December 2 2022 the public profiles you have on your site will be unavailable and you will be unable to access the data from the back end of WordPress. If you wish to maintain your profiles on your webiste, you will need to take action before December 2 2022.
Methods
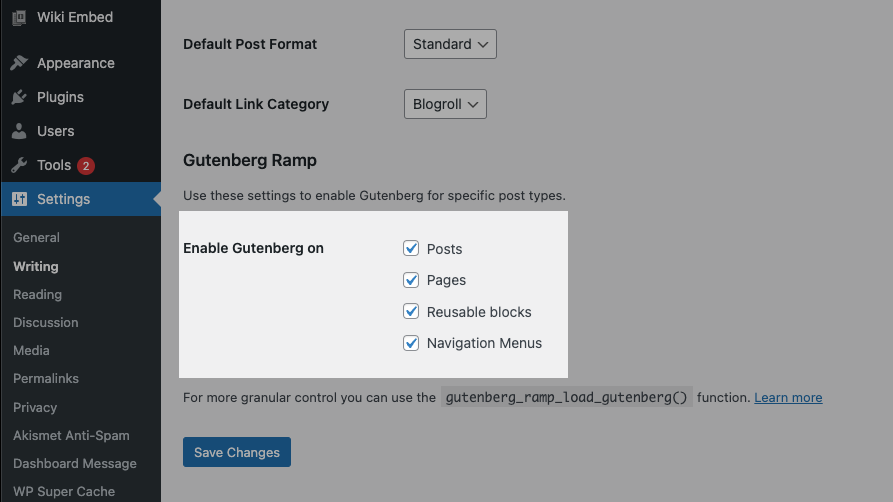
We strongly encourage all UBC CMS site owners to use the new Block Editor (codenamed Gutenberg) within WordPress. It is disabled by default, but can be enabled by visiting Settings > Writing from your site’s dashboard and checking each box next to ‘Enable Gutenberg On’ and then pressing ‘Save Changes’. For additional functionality within the Block Editor, you can also enable the Gutenberg Plugin.
Alternative 1: Preferred and Recommended Method: Using The Block Editor
Using the block editor within WordPress provides multiple advantages not just in this particular use-case. It is a much more detailed editor which gives your content authors more control over how their content appears without needing to resort to custom code or shortcodes. It is also the fastest and easiest alternative to the Profiles CCT plugin.
Step 1: Enable the WordPress block editor
Once you have enabled Gutenberg, or if your site is already using Gutenberg, then you have everything you need in order to create profiles for the people in your unit, faculty, or department. No additional plugins are required.
You will be creating WordPress posts for each user and placing them into categories. Then, to display these posts you will be using the Query Loop Block within the block editor.
Step 2: Create categories to help organize your list of users
Create a category into which you are going to place all of your user profiles. Perhaps name this category ‘profiles’, however the choice is up to you. You create categories at Dashboard > Posts > Categories.
Optionally, create sub-categories (or ‘child’ categories) which will allow you to group your profiles and display them separately.
Step 3: Create a post for each person
For each person that needs a profile, create a post and add that post to the ‘profiles’ category (or whatever you named it in step 2). Optionally add it to the sub-categories if you created them. You have freedom over what you put in each profile. It is likely that you want to use the title field for the person’s name, and the featured image as the photo for that person. Within the main content, you can put whatever information you like, leveraging any of the blocks available to you including tabs, accordions, galleries, lists etc.
Step 4: Create archive page(s) to display your profiles
In order to publicly show our profiles in a location of our choosing we need to create a new page. Add a Query Loop Block. If you are familiar with the Loop Shortcode then the Query Loop Block provides very similar functionality but does so in a more visual, easy-to-use way. By default the Query Loop Block will list all of your posts and show up to a maximum of 10 of them per page. It will also have a certain template so that on each post it shows, it will have the title, featured image, and potentially other items depending on when you are reading these instructions. You are able to show whatever you like for each post – what is shown depends on the post template. You may wish to press ‘Start Blank’ towards the top right which will then present you with several options. Try Title and Excerpt. You’ll now see a list of ALL of your posts’s titles and excerpts (probably limited to the most recent 10). We, however, don’t want to show ALL of our posts, we want to show just our profiles. We do that by limiting the query to the category we created in step 2. With the Query Loop Block selected, in the sidebar on the right, type ‘Profiles’ (or whatever you named it) under ‘categories’ in Filters. You’ll then see the posts listed live update once you select your category. Now it’s up to you to decide how to layout your profiles on this archive page.
Alternative 2: Loop Shortcode
The Loop Shortcode method is practically identical to the above, however it is for those folks who are not yet using the new block editor within WordPress. Please read the above, preferred, method before continuing with the loop shortcode.
You will still need to perform steps 2 and 3 from above but instead of using a Query Loop Block in step 4 you will instead replace it with a Loop Shortcode.
The Loop Shortcode allows you to display content from one or more posts or pages on a separate page elsewhere on your site. You can ‘query’ your own site and then loop over the results of that query and decide one what to display for each result. For you, you will be querying your site for all profile posts and then displaying them.
Create an archive page as in step 4 above, but instead of a Query Loop Block you will add a Loop Shortcode. For our purposes, you wish to limit to your profiles category so you will want something along the lines of:
[loop query="posts_per_page=5&category_name=profiles"]If you wish to create a custom template for each of your profiles, then take a look at the documentation for the loop shortcode to create the layout you desire.
Alternative 3: Pages
Another possibility is that you create custom pages, one each for your profiles. This more easily allows you to have a hierarchy should you wish, and to have neater URLs for your individual profiles. You can still use a loop shortcode as above (but ensure you use post_type=page in your query. Don’t forget you don’t get taxonomies with pages, and there are other limitations therein especially if you require complex data filtering.